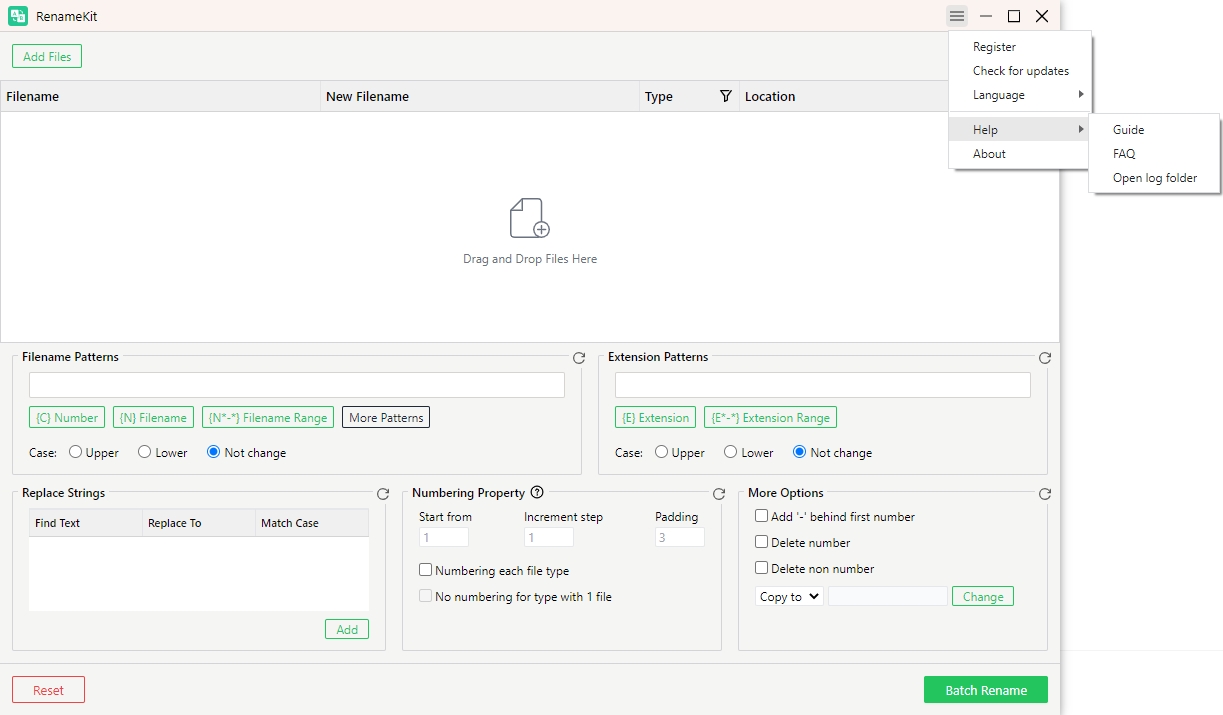
Get Started with RenameKit
Are you tired of manually renaming files one by one? Look no further than RenameKit!
Here’s a detailed guide using RenameKit to rename multiple files in bulk on your Windows and Mac device.
1. How to Download and Install RenameKit?
1.1 Download RenameKit
Select your computer operating system, click on the download button to save the RenameKit installer file to your computer.
1.2 Install RenameKit
On Windows
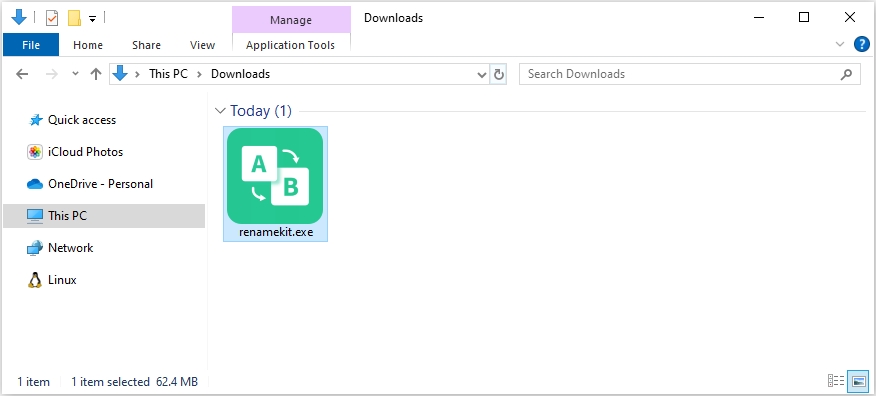
Locate the RenameKit downloaded installer file “renamekit.exe“, then double-click the installer file to run it.
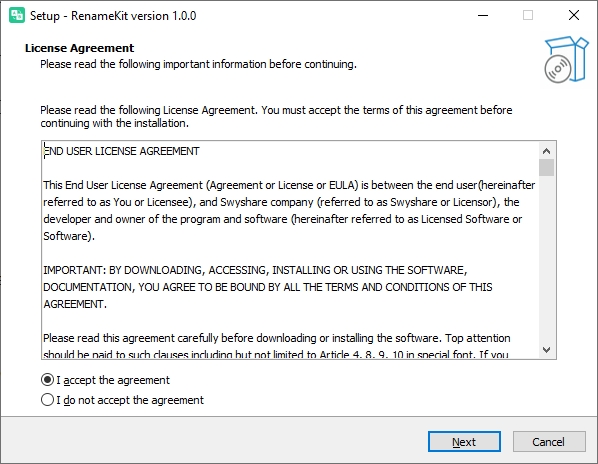
You will be required to read and agree to the End User License Agreement (EULA). If you agree, check the box and click “Next” to begin installing RenameKit.
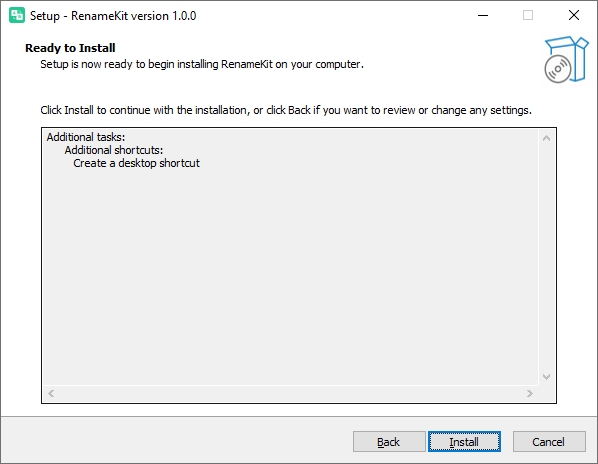
Click “Install” to begin the RenameKit installation process.
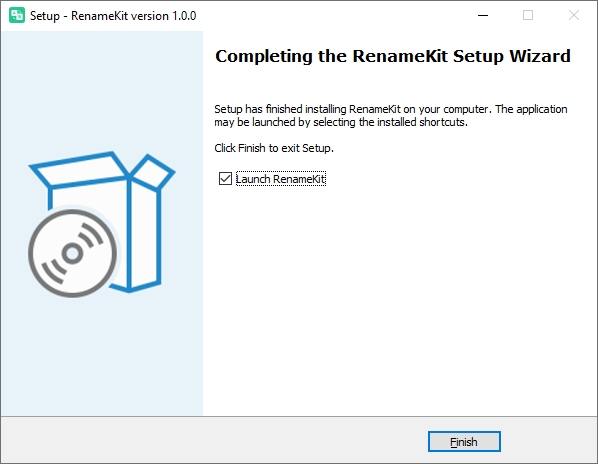
Once the installation is complete, click “Finish“. You can now open RenameKit from the Start menu or by double-clicking the desktop shortcut.
On Mac
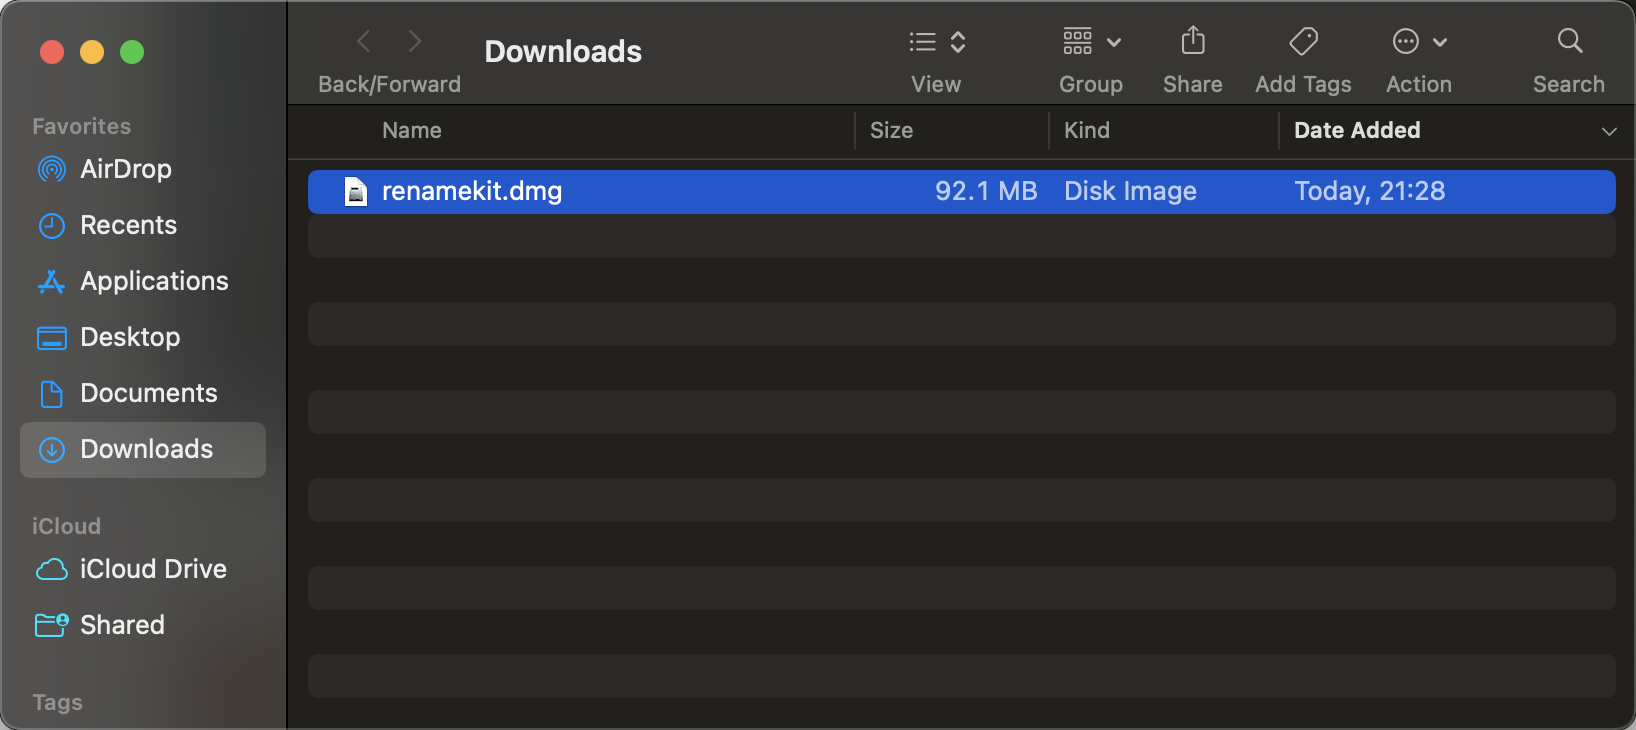
Locate the downloaded installer file “renameKit.dmg“, then double-click the installer file to open it.
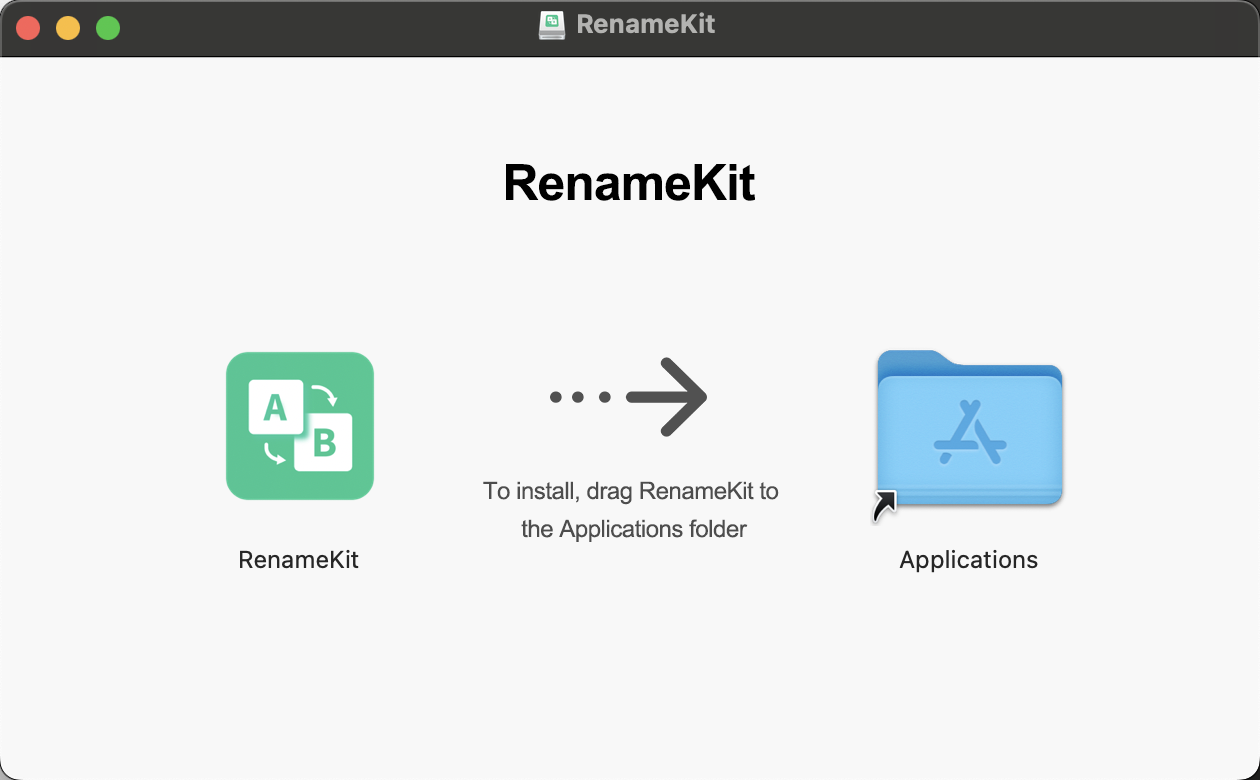
A new window will appear with the RenameKit icon, drag the RenameKit icon into the “Applications” folder.
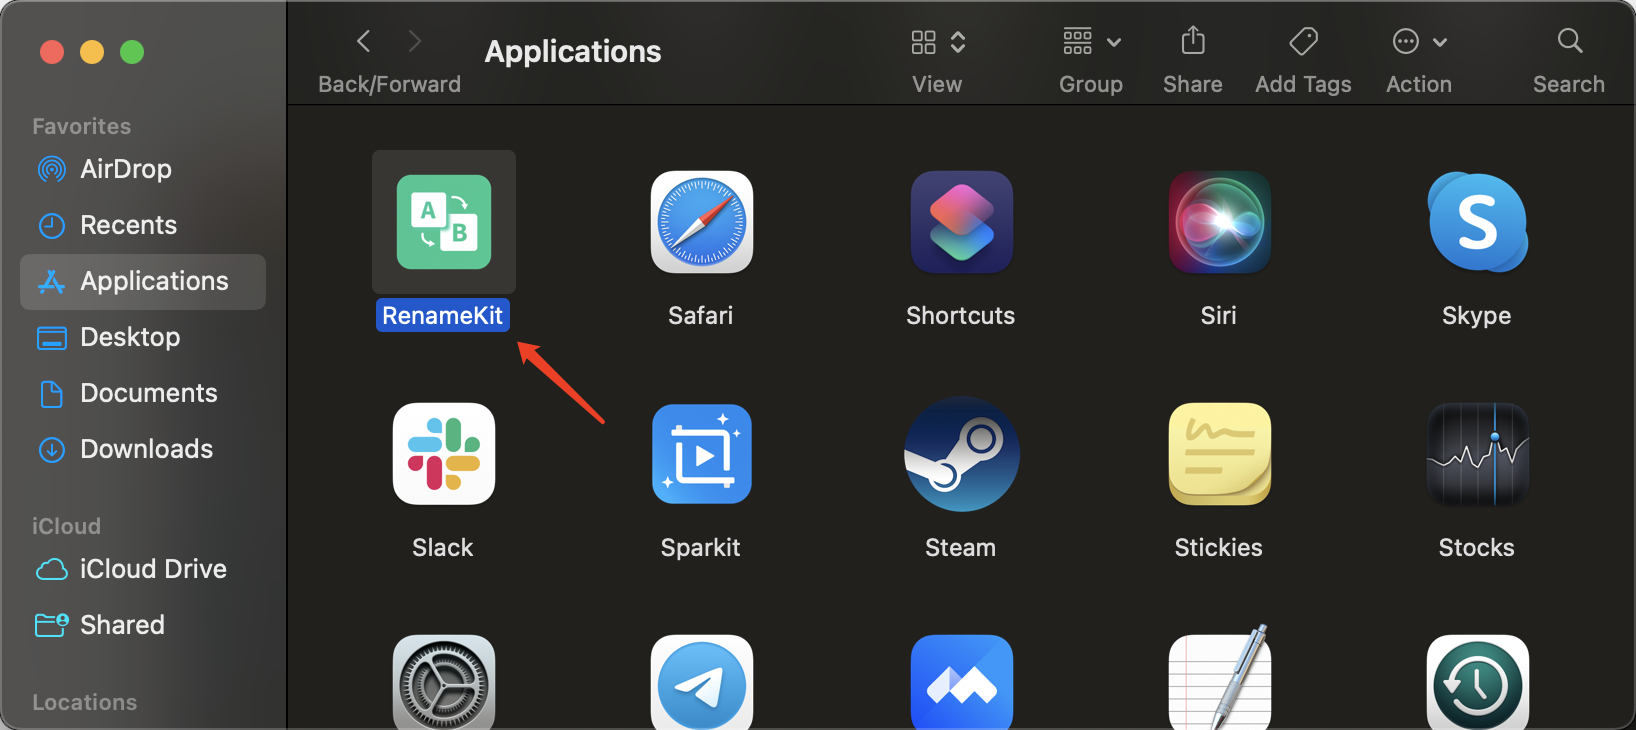
Open the “Applications” folder and locate RenameKit, double-click the RenameKit icon to launch the application.
2. How to Register RenameKit?
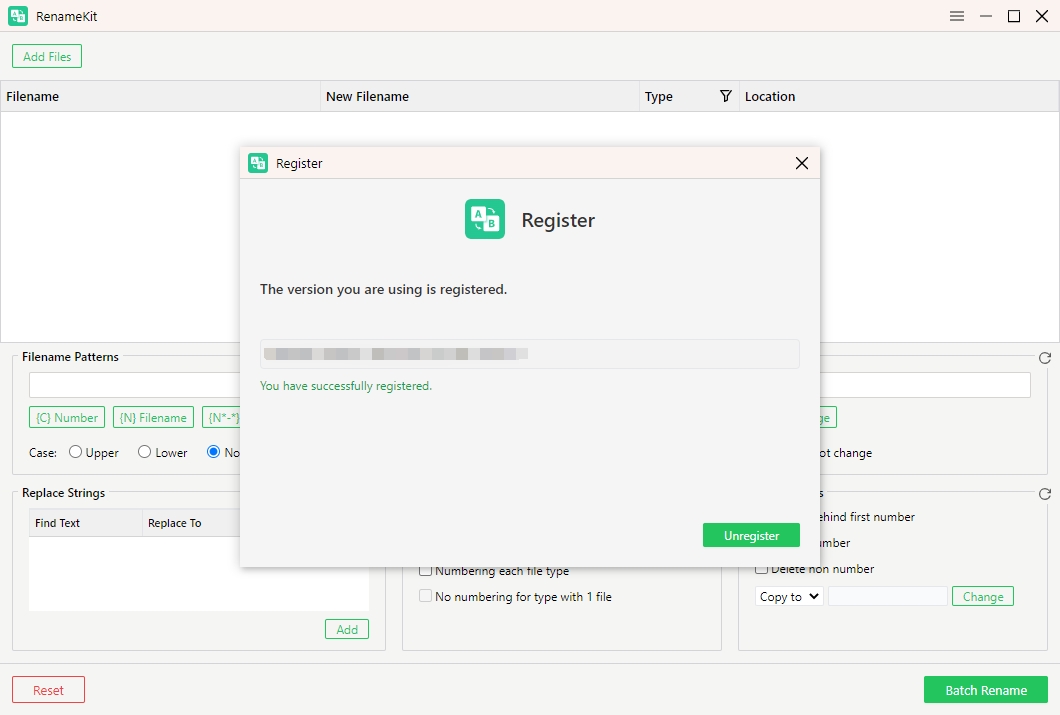
RenameKit provides a free trial version that allows to try it’s all feature for 7 days. To use RenameKit’s all features without limitations, you’ll need to register the software.
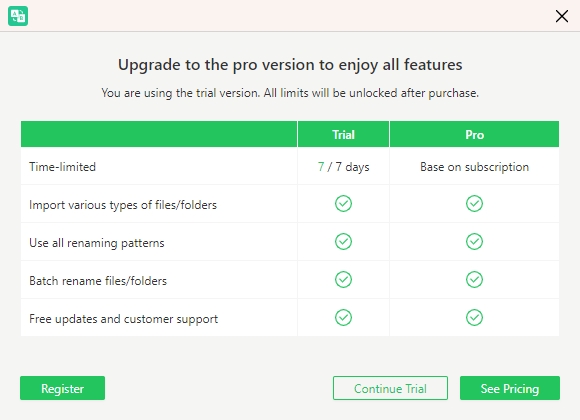
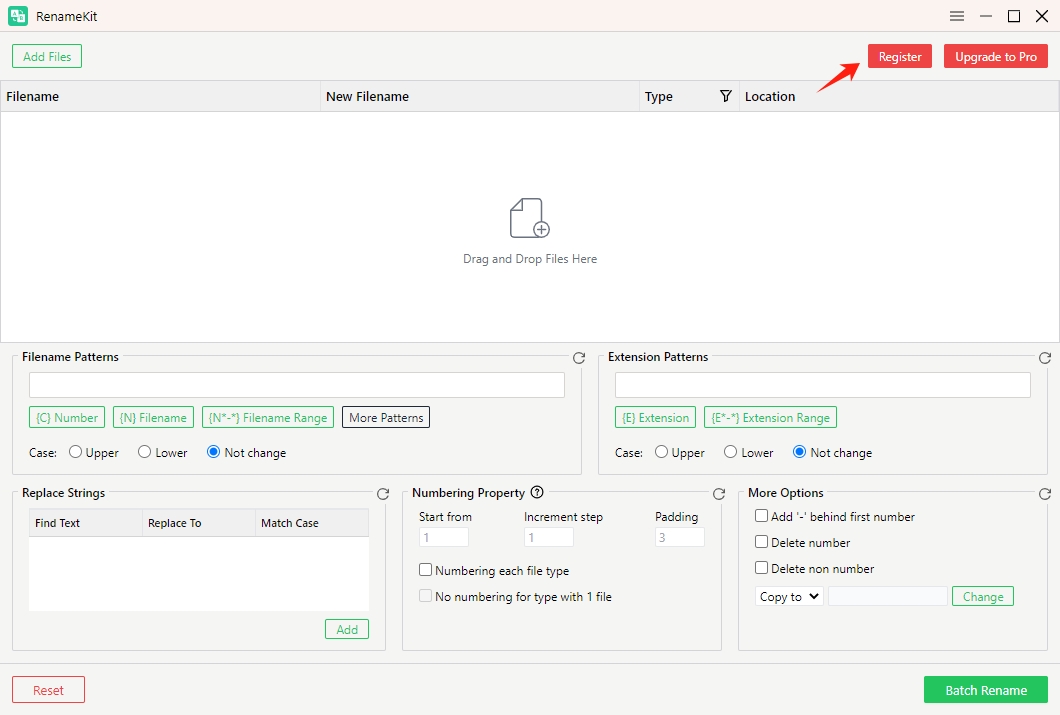
Open RenameKit, look for a menu option labeled “Register” in the top menu bar and click on it.
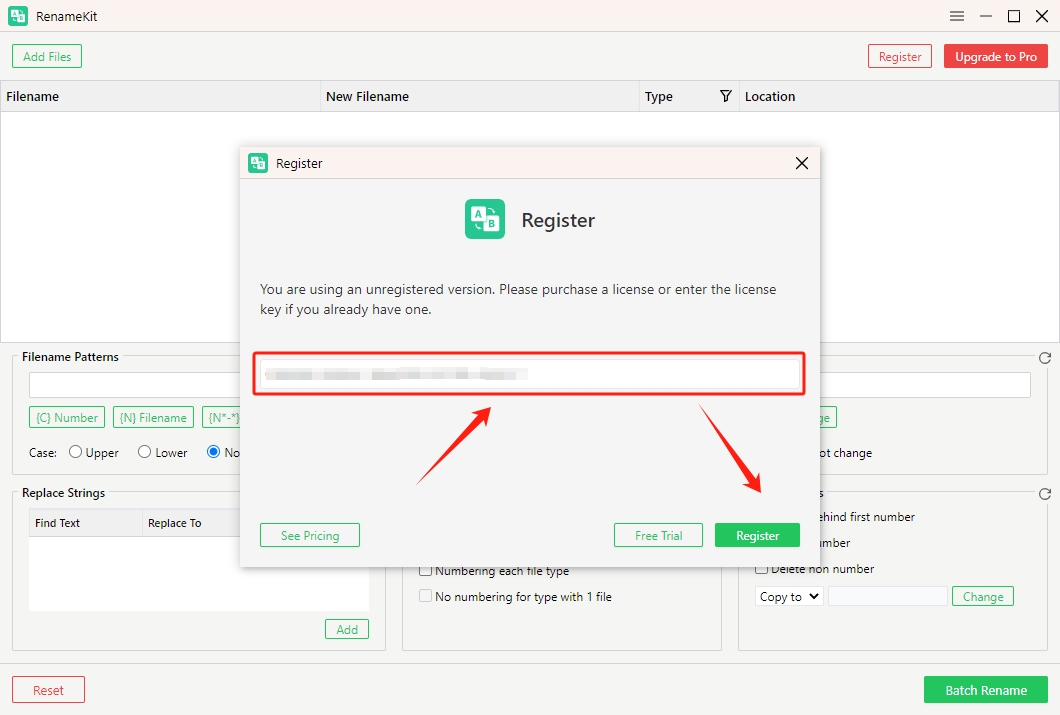
In the registration window, you’ll see fields to enter your license information.
If you have already purchased a license, enter the license key exactly as provided in your purchase confirmation email. After entering the license key, click on the “Register” button and RenameKit software will verify your license key.
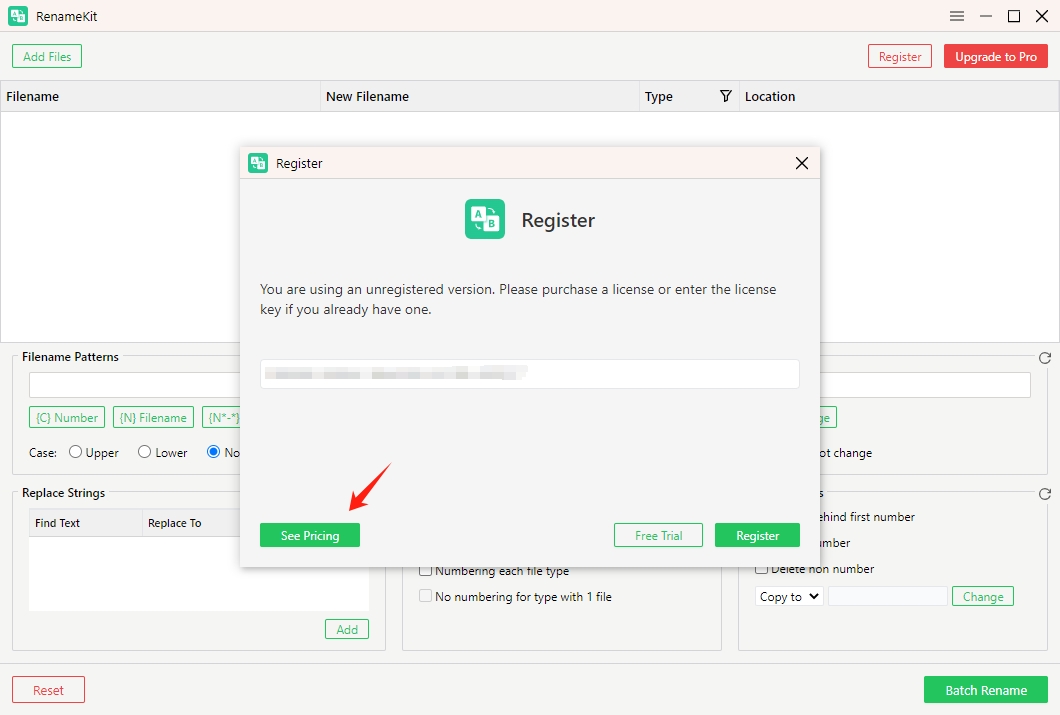
If you haven’t purchased a license yet, you can click “See Pricing” to buy one from the official RenameKit website.
After successful registration, you can start using RenameKit to rename filenames without limits.
3. RenameKit Interface Overview
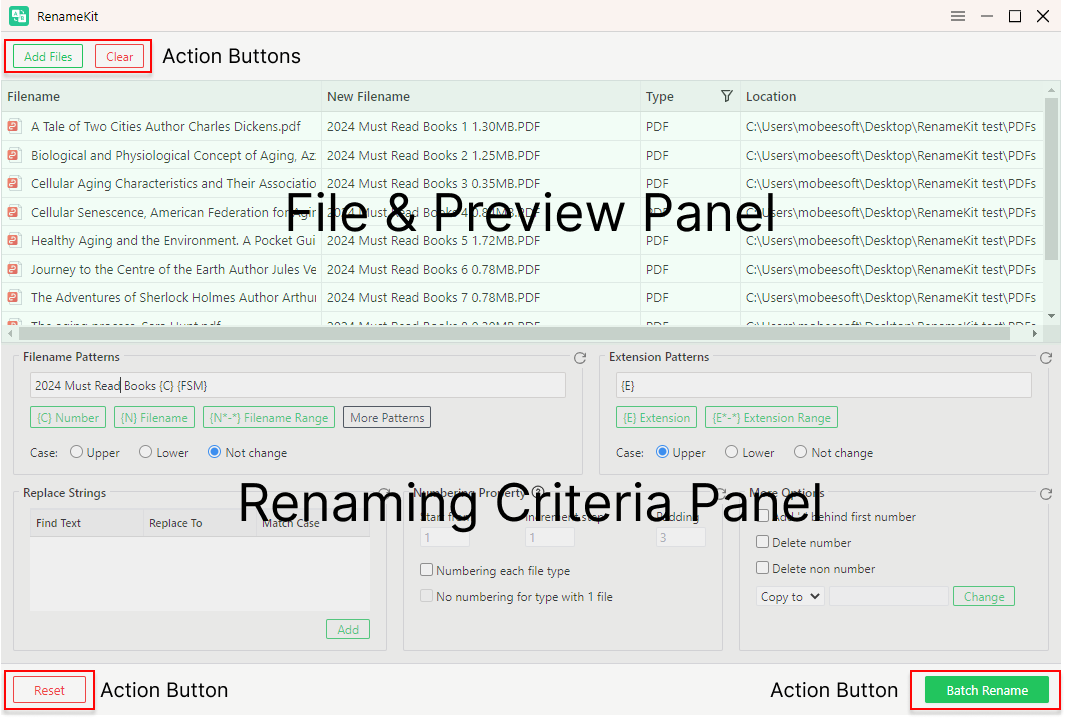
RenameKit is designed with an intuitive interface that makes it easy for users to navigate and utilize its powerful bulk renaming capabilities.
Here’s a detailed overview of the RenameKit interface and its main components:
- File & Preview Panel: Displays the files and folders in the selected directory & Shows a preview of the new file names based on the current renaming criteria.
- Renaming Criteria Panel: Contains various fields and options to set your renaming rules.
- Action Buttons: includes “Add Files”, “Filters”, “Clear”, “Reset”, “Copy to”, “Move to”, “Batch Rename”.
4. RenameKit’s Filename Patterns
4.1 Adding Prefix/Suffix
RenameKit allows you to append or prepend specific text to file names. This is useful for categorizing, organizing, or identifying files by adding descriptive or consistent text elements to their names.
How to add prefix/suffix to file names:
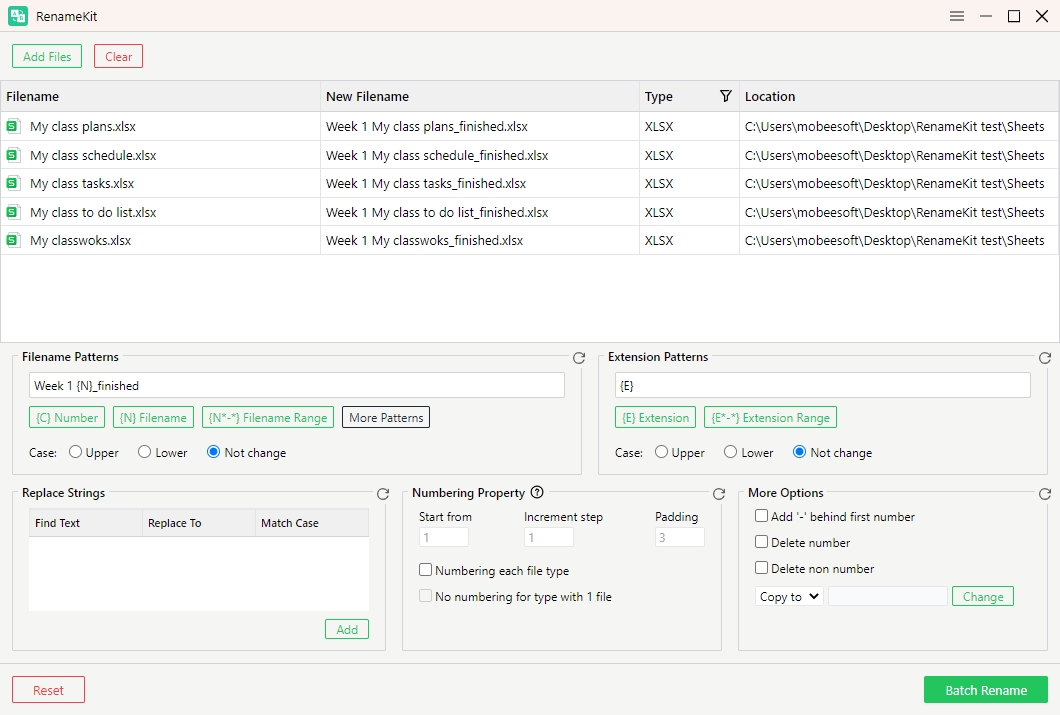
Locate “Filename Patterns” > Click on {N} Filename > Type the prefix or suffix text you want to add to each file name in the provided field.
e.g., adding the prefix “Week 1” and the suffix “_finished” to the end of each document file name.
4.2 Changing Case
RenameKit allows you to change the case of file names to upper case, lower case, title case, and more. This feature is useful for standardizing file names, making them more readable, or complying with naming conventions.
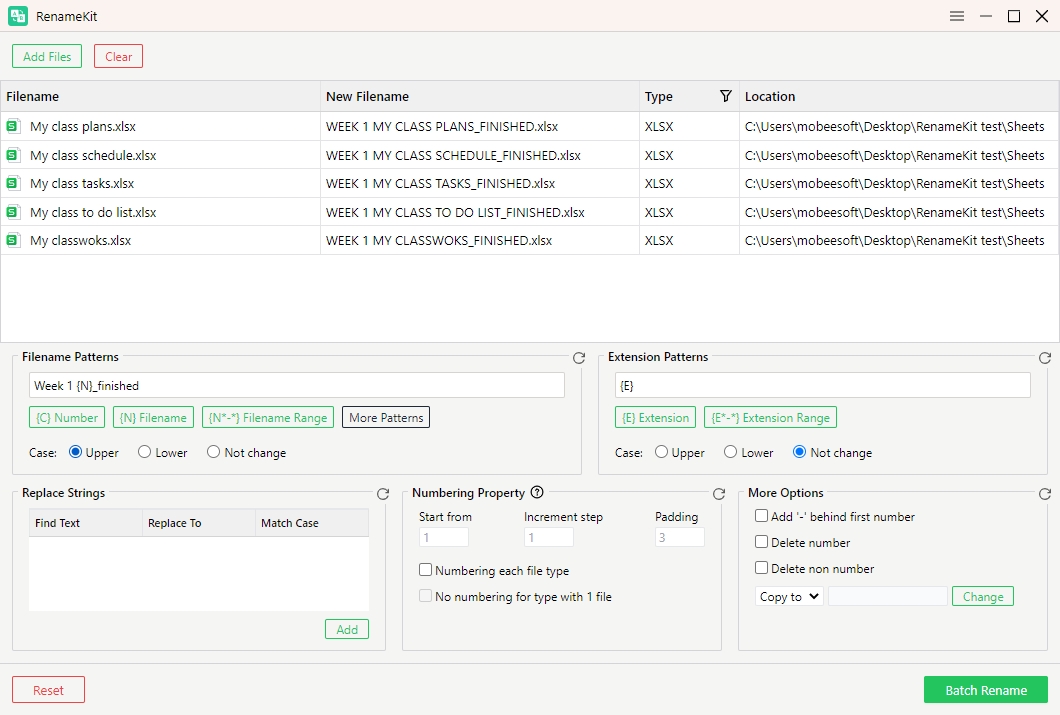
• Upper case: Converts all letters to upper case (e.g., “RenameKit.txt” becomes “RENAMEKIT.TXT”).
• Lower case: Converts all letters to lower case (e.g., “RenameKit.txt” becomes “renamekit.txt”).
• Not change case: Don’t convert any letter to upper or lower case.
How to change case to file names?
Locate “Filename Patterns” > Choose patterns > Select “Upper case“, “Lower case” or “Not change case“.
e.g., configuring upper case conversion:
4.3 Adding Numbers
RenameKit allows you to incorporate sequential or custom numbering into file names. This is useful for organizing files in a specific order, such as numbering images or documents for easy identification or sorting.
How to add numbers to file names?
Locate “Filename Patterns” > Add “{C} Number” > Go to “Numbering Property” panel > Configure numbering options including starting number, increment value and padding.
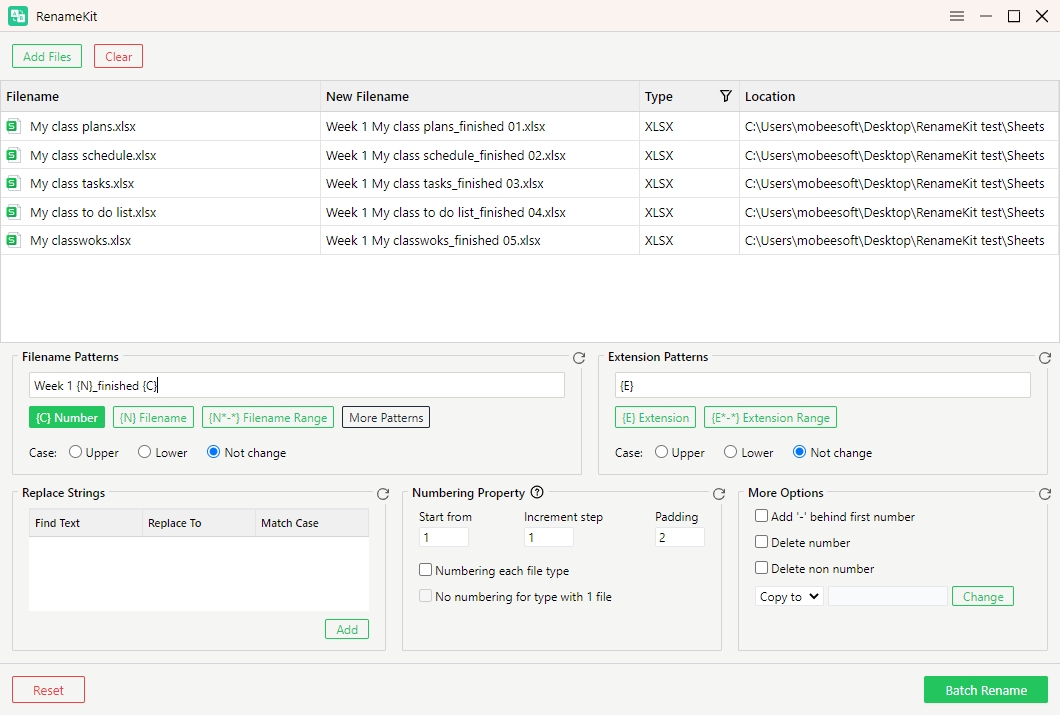
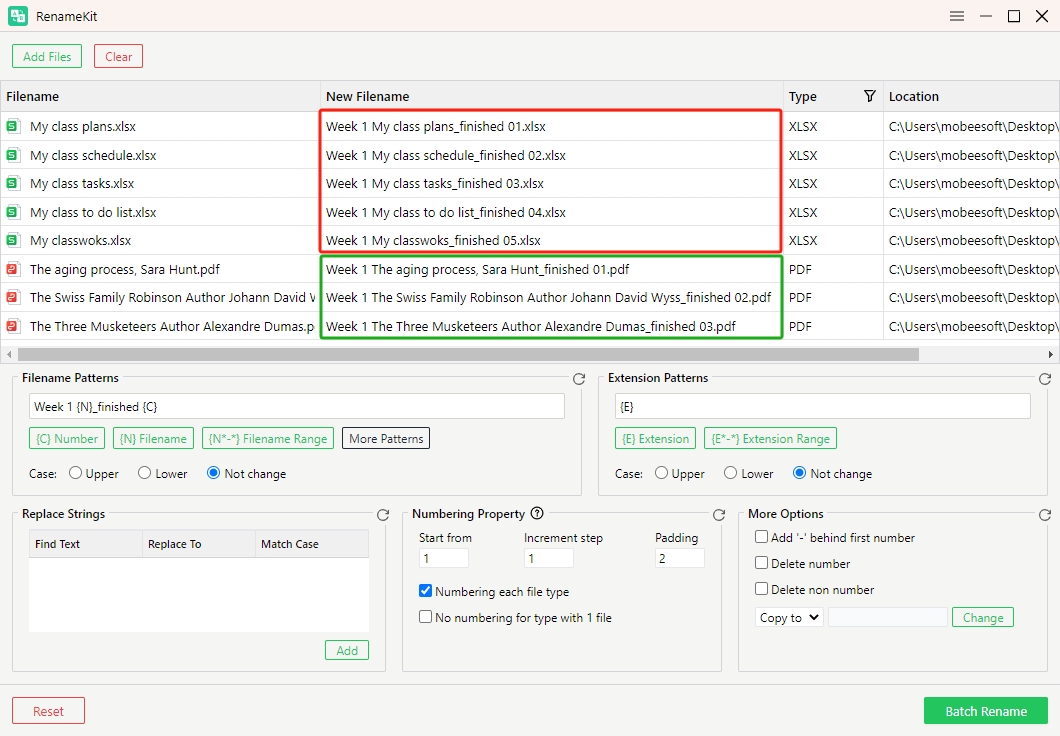
You can also click “Numbering each file type” to ensure that each type of file is numbered correctly & consistently, and choose no numbering when there is only one file for a type.
4.4 Choosing File Name Range
The Choose Filename Range feature in RenameKit allows you to select and apply renaming rules based on specific character positions within file names.
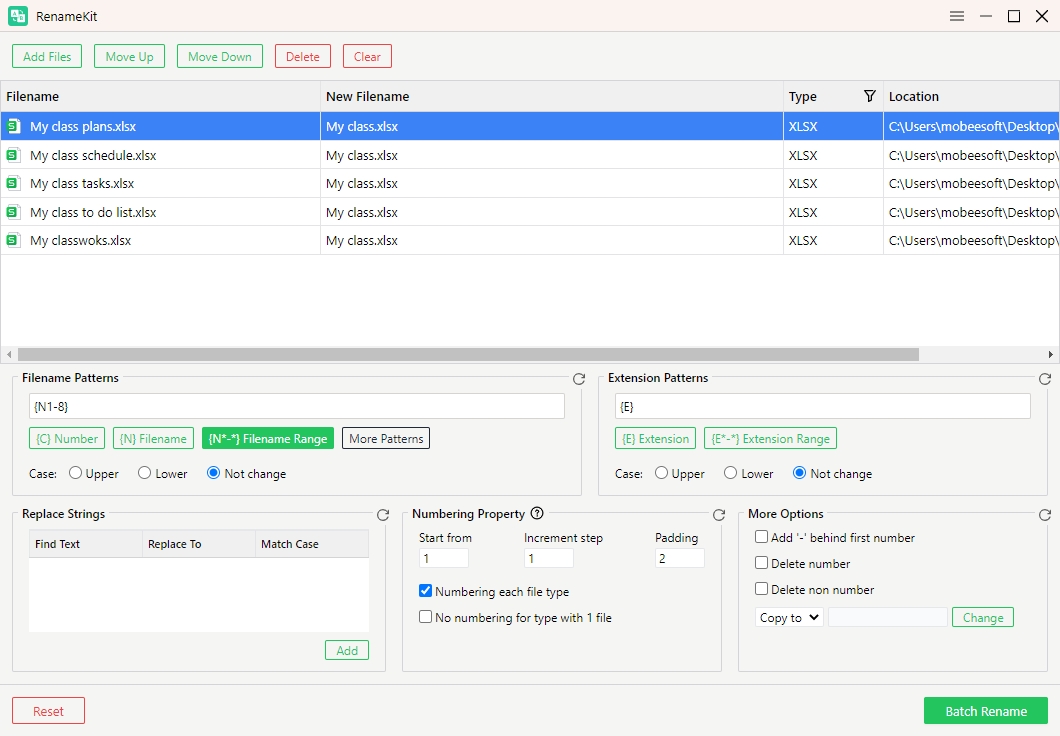
Locate “Filename Patterns” > Choose “{N*-*} File Name” > Enter the starting and end character position of the range you want to modify.
e.g., to target characters 1 through 8 in the file names, click “{N*-*} File Name” and edit to {N1-8}.
4.5 Finding & Replacing Text
RenameKit offers powerful features for adding or replacing text in file names, which is particularly useful for organizing files, adding descriptors, or correcting naming errors.
How to find and replace text?
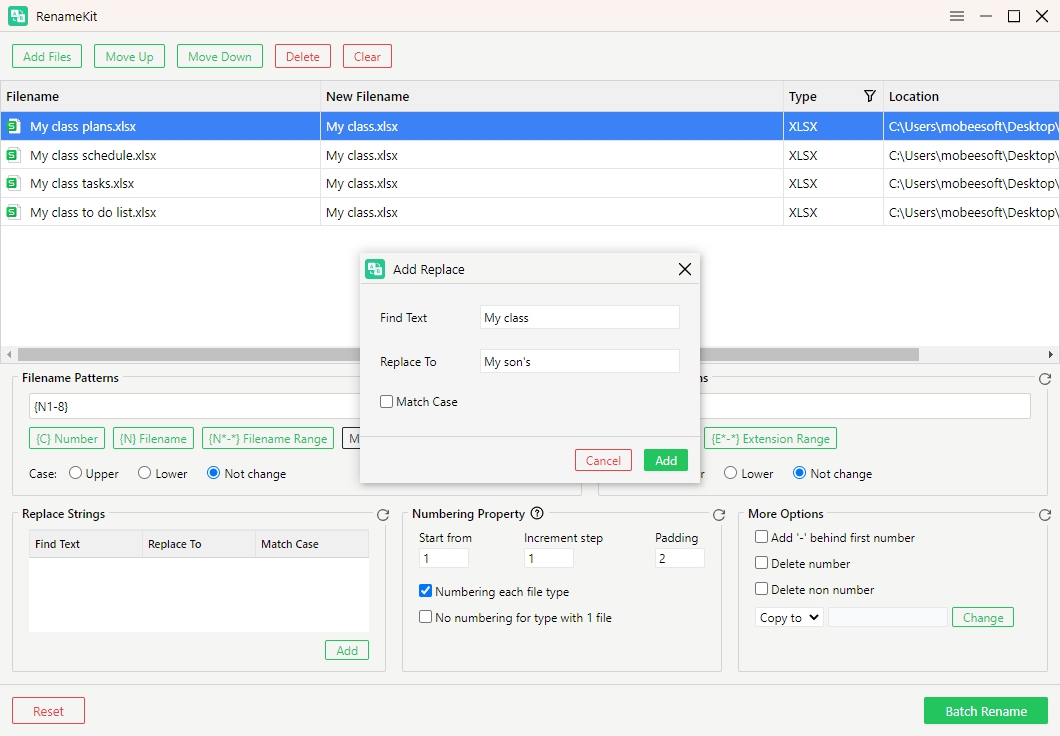
Locate “Replace Strings” > Click “Add” > Enter the text you want to search for in “Find Text” field > Enter replacement text in “Replace to” field > Click the “Add” button to execute the find and replace operation on all selected files.
e.g., find “My class” and repalce to “My son’s”.
4.6 Adding File Information
RenameKit allows you to add various types of file information to your file names, making them more informative and organized. This can include general file information, image-specific details, audio metadata, and video attributes.
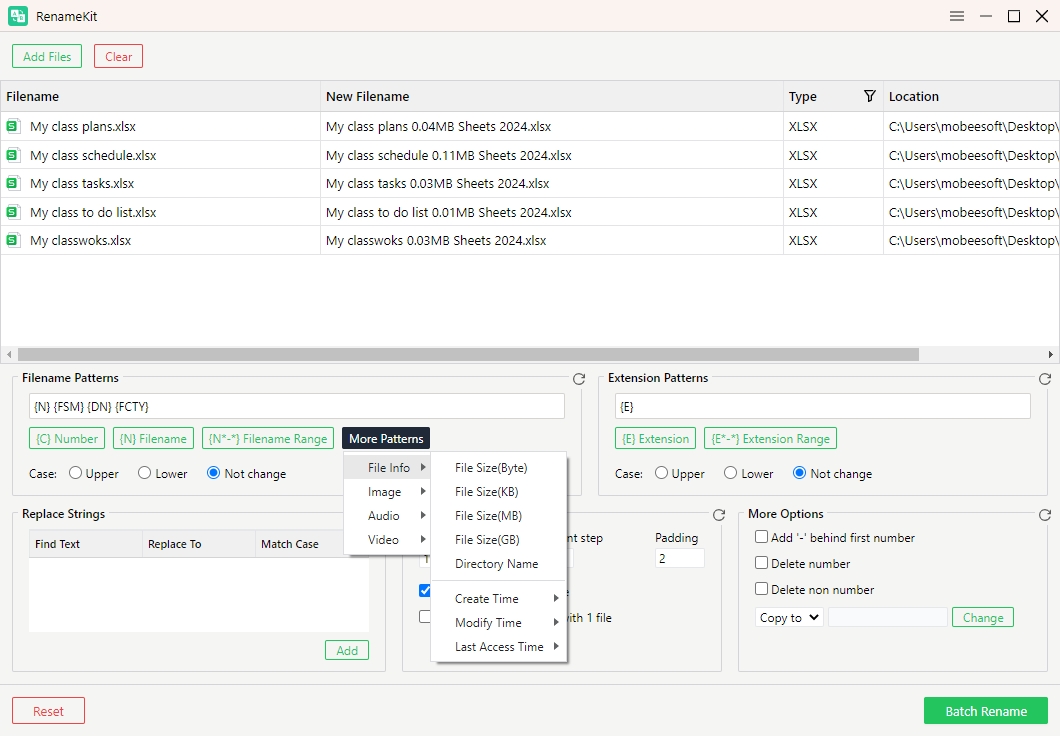
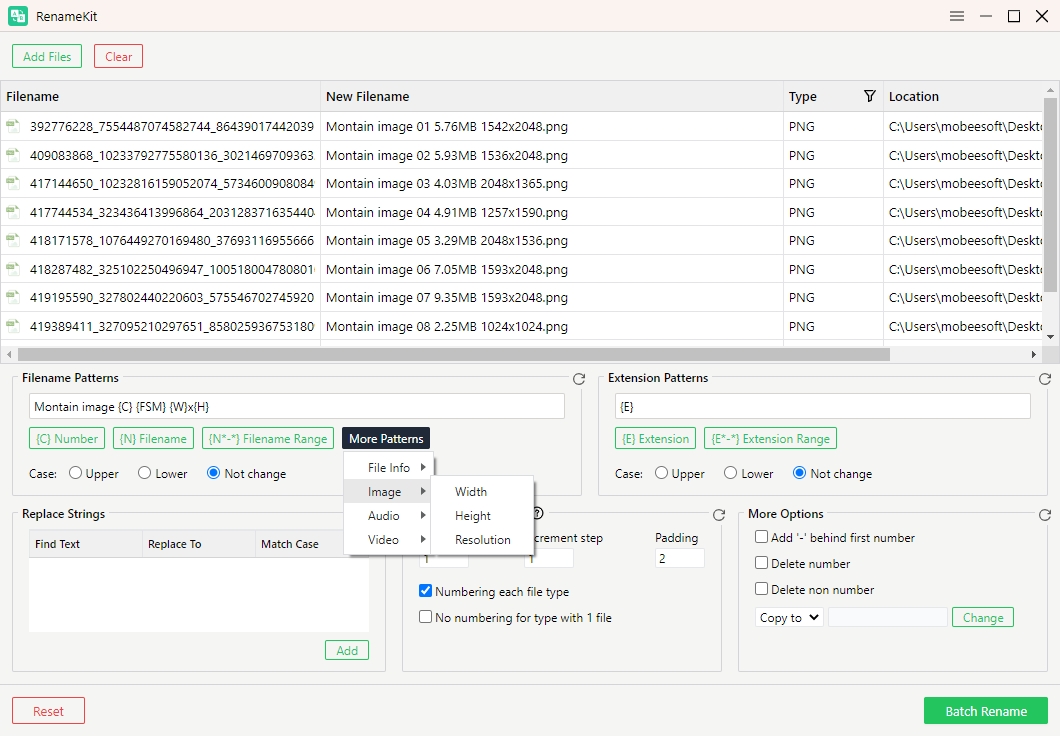
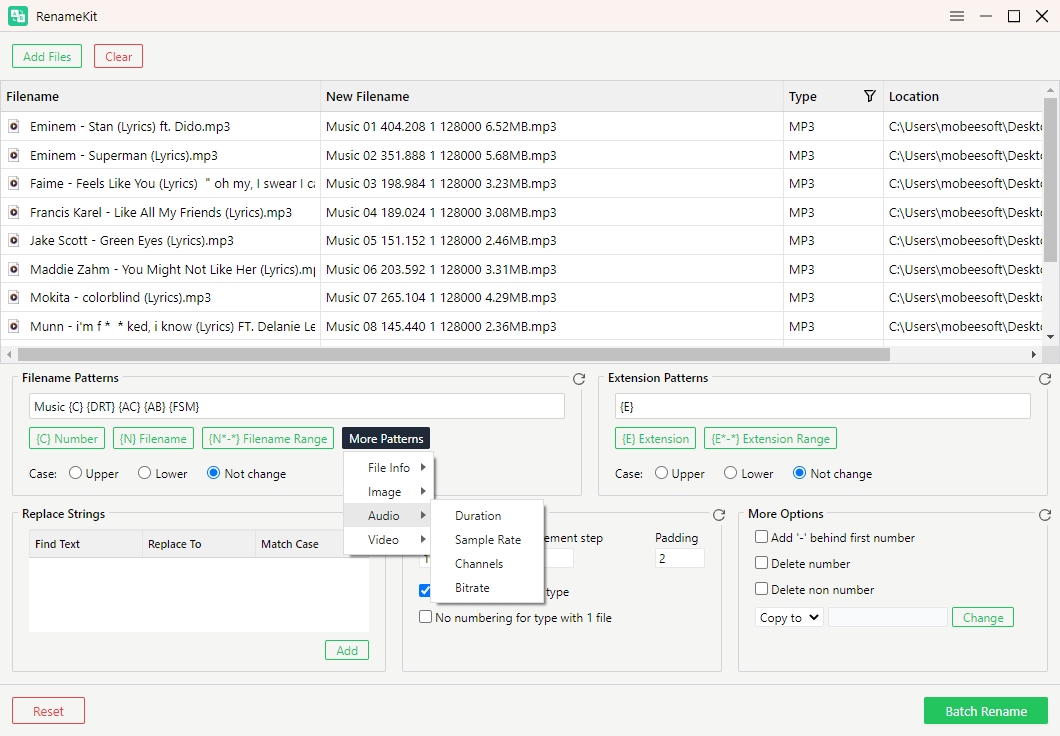
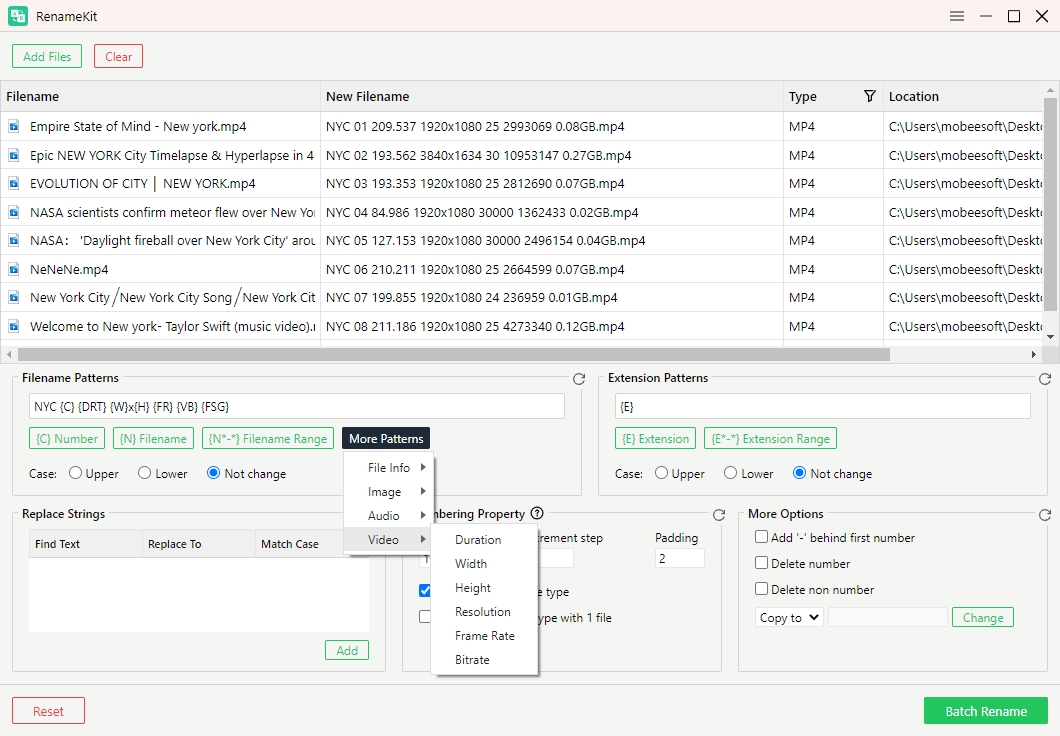
Locate “File Patterns” > Click “More Patterns” > Choose file type and add specific details to you file names.
RenameKit supports adding these details into file names:
• General File Information: Add file size, directory name, creation time, modification time, and last access time to file names.
• Image information: Add width, height, and resolution of images to file names.
• Audio information: Add duration, sample rate, channels, and bitrate of audio files to file names.
• Video information: Add duration, width, height, resolution, frame rate, and bitrate of video files to file names.
4.7 Changing Extension
RenameKit allows you to change file extensions. which is useful when you need to standardize file extensions, convert file types, or correct incorrect extensions.
How to add change extensions to file names?
Locate “Extension Patterns” > Enter the new file extension you want to apply to the selected files > Change the extension case if needed.
e.g., changing file extensions from .png to .jpg:
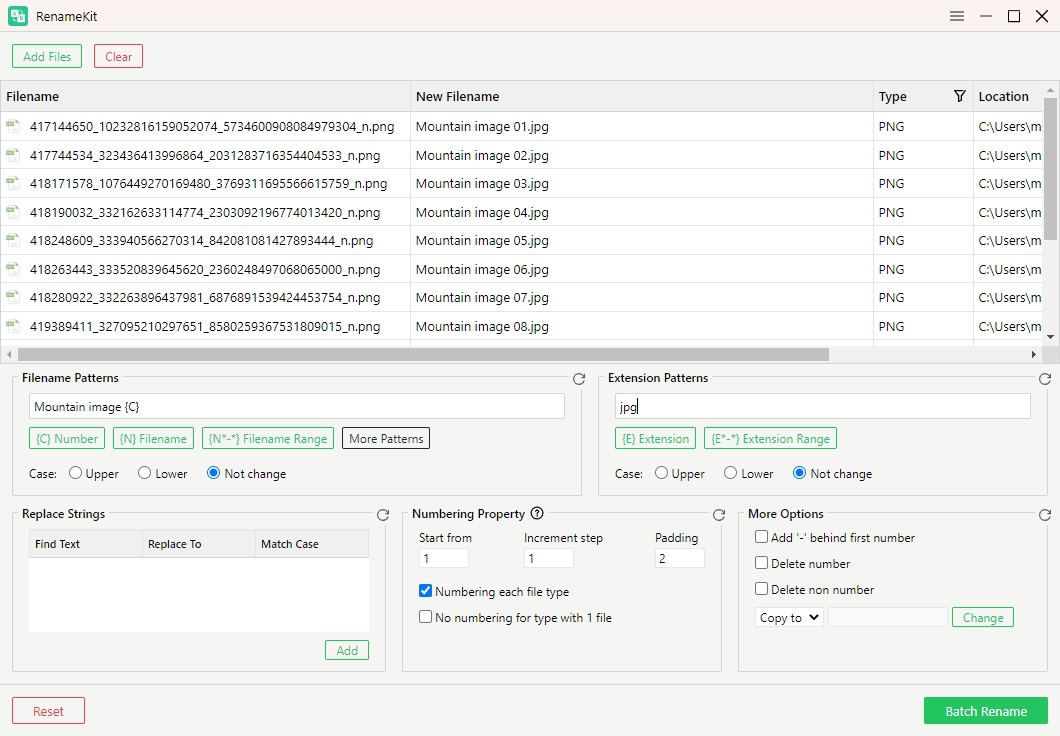
Note: Be cautious when changing file extensions, as incorrect extensions can render files unusable if the content does not match the extension.
4.8 Combining Rename Rules
You can apply multiple renaming criteria to your files simultaneously with RenameKit according to your needs. This can be particularly useful for complex renaming tasks that require a combination of different rules.
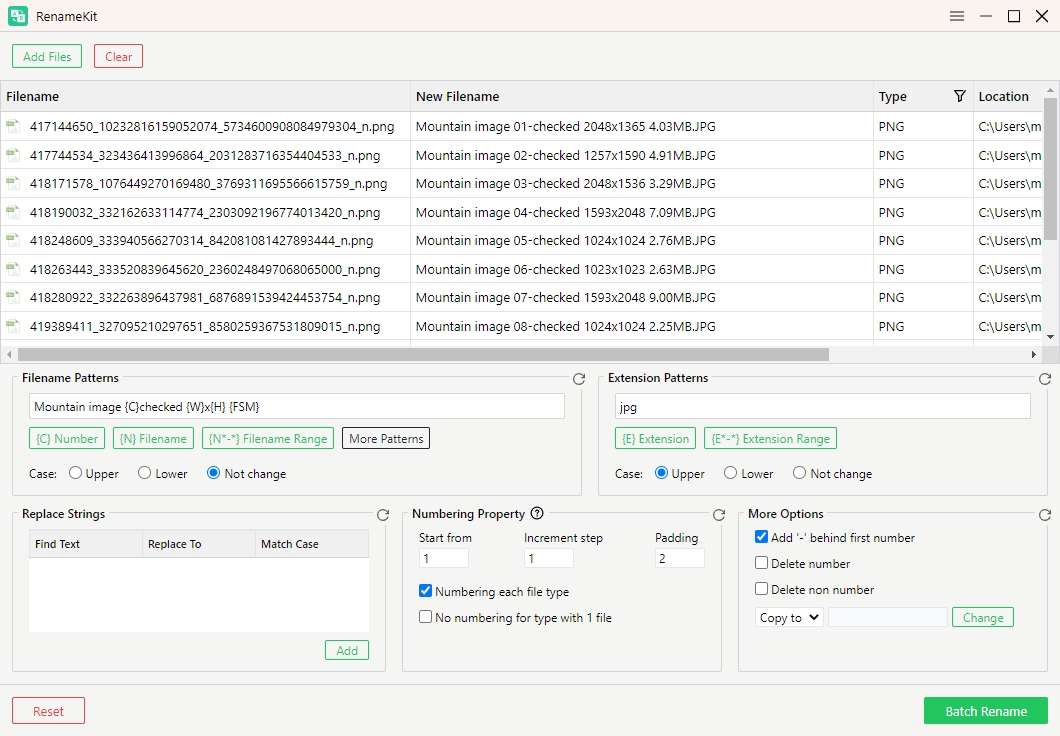
5. RenameKit’s Action Buttons
5.1 Filter Files or Folders
RenameKit allows you to narrow down the selection of files or folders based on specific criteria. This feature is essential for targeting only the files or folders that meet particular conditions, making bulk renaming more efficient and organized.
How to filter files or folders:
Locate file panel > click on the filter icon in the “Type” option > Filter files based on type.
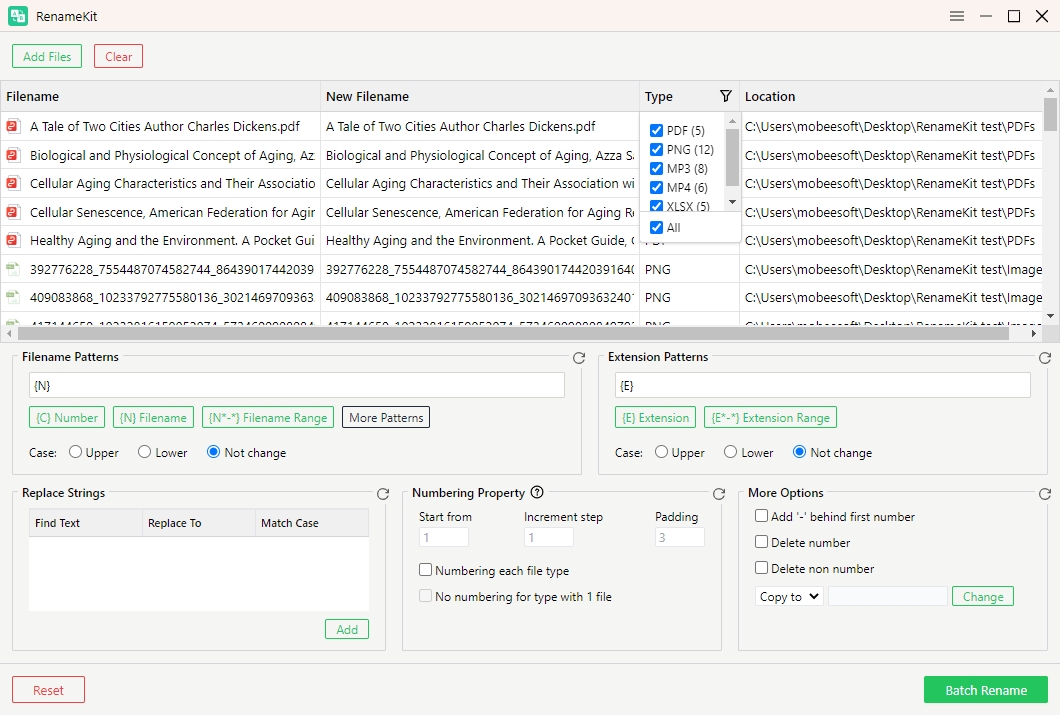
5.2 Move or Copy Files
RenameKit also provides functionality to move or copy files as part of the renaming process. This feature is particularly useful when organizing files into different directories or creating backups.
How to move or copy files?
Locate “More Options” > Choose “Copy to” or “Move to” > Select the target folder where you want to move or copy the files > Confirm the destination directory.
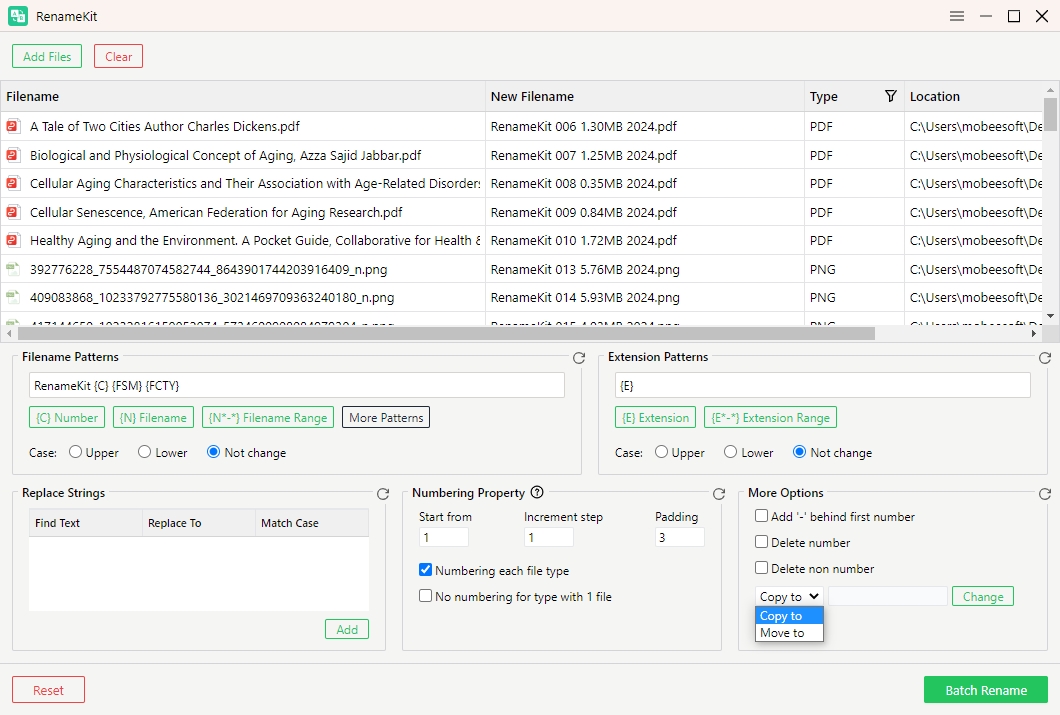
5.3 Reset Renaming Rules
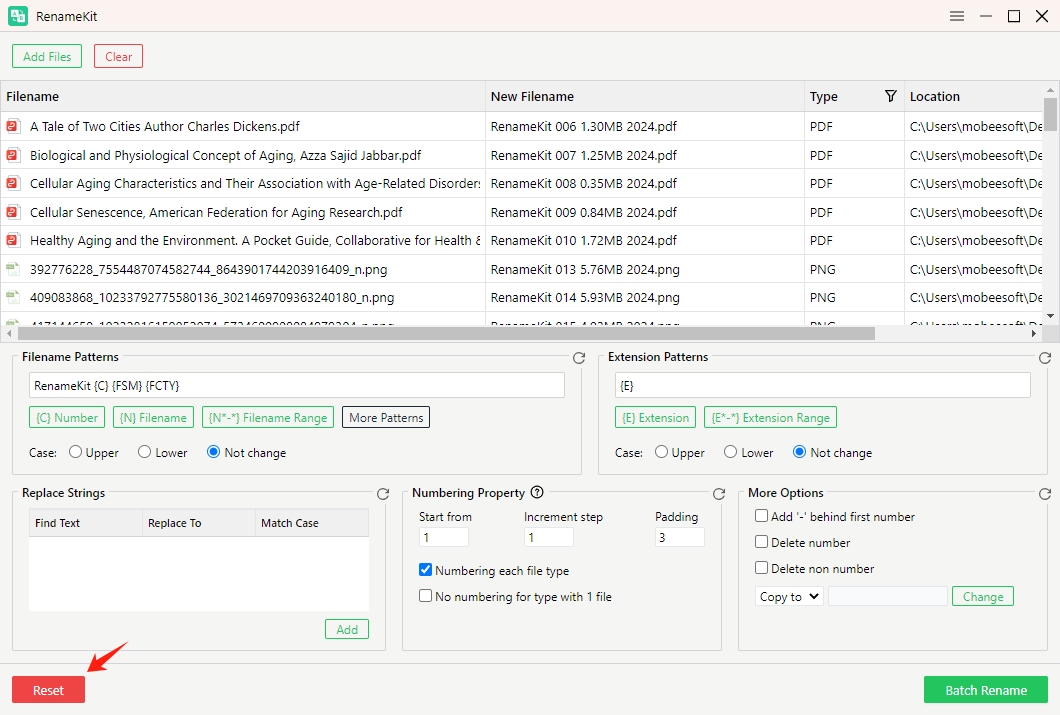
The Reset Renaming Rules feature in RenameKit allows you to clear all the current renaming criteria and start fresh. This can be useful if you want to discard the current settings and reconfigure new renaming rules from scratch.
How to use the Reset feature?
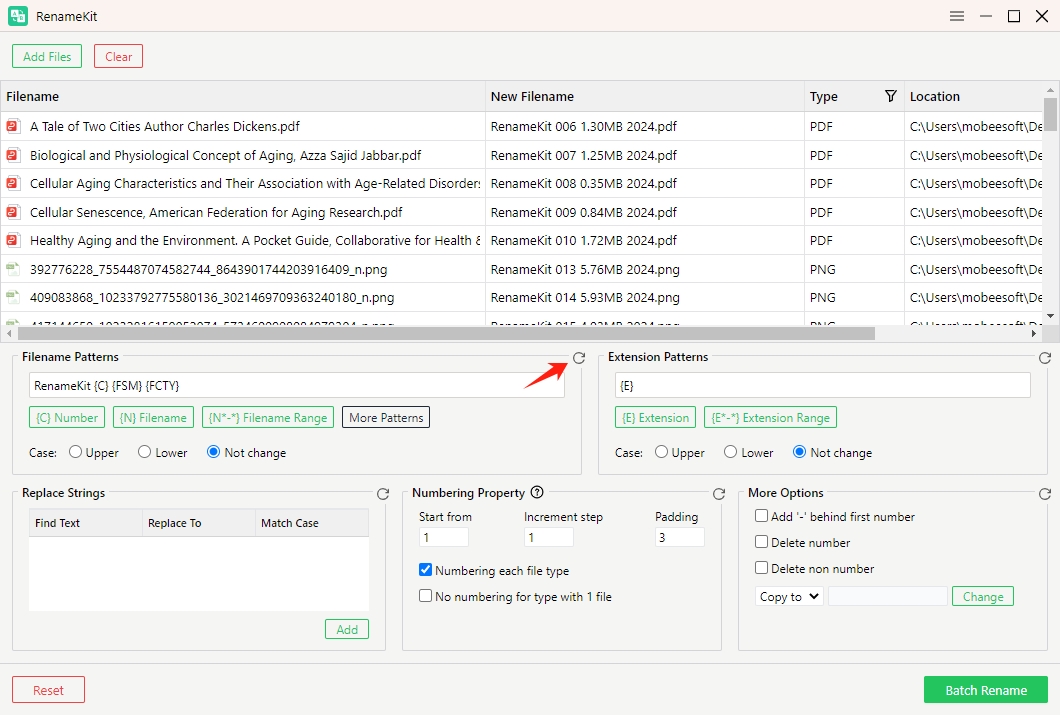
Click the “Reset” icon at the bottom of each pattern section will remove renaming criteria within the section.
Click the “Reset” button in the lower left corner of the interface will remove all the current renaming criteria that have been set up.
5.4 Batch Rename Filenames
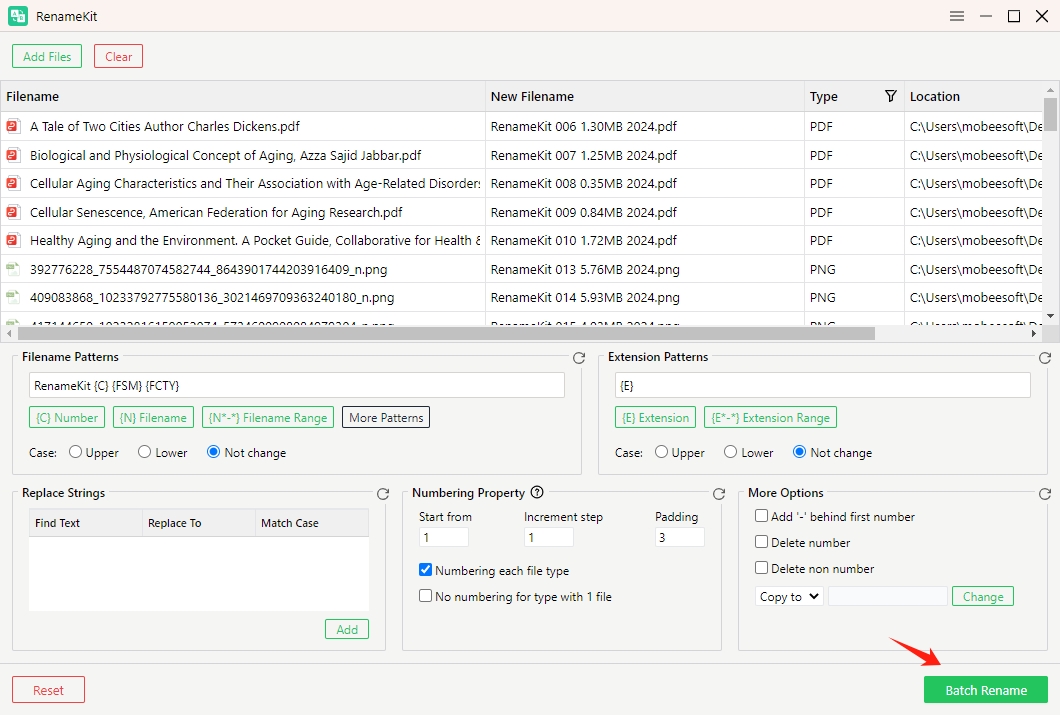
RenameKit allows users to rename multiple files with one-click. You can click “Batch Rename” button to apply the new names to the selected folder verify the changes in the preview pane and save them in the chosen destinational folder.
5.5 Delete a File or all Files
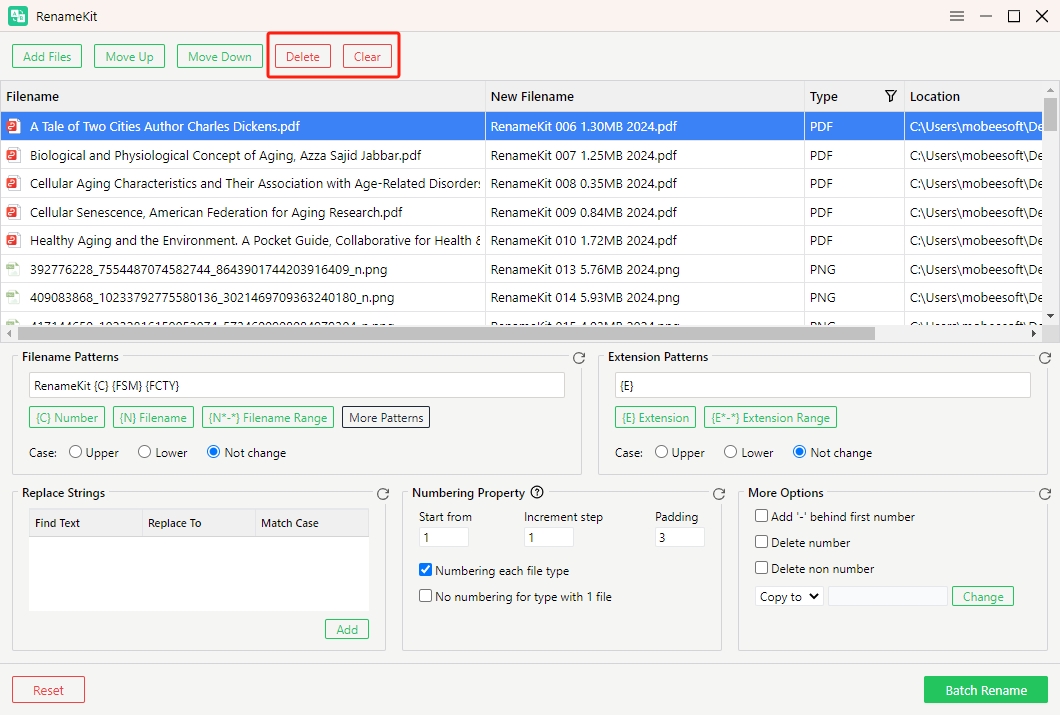
If you want to clear a specific file, select the file and click “Delete“. If you want to clear all files from the current list, press “Clear“.
6. How to Update RenameKit?
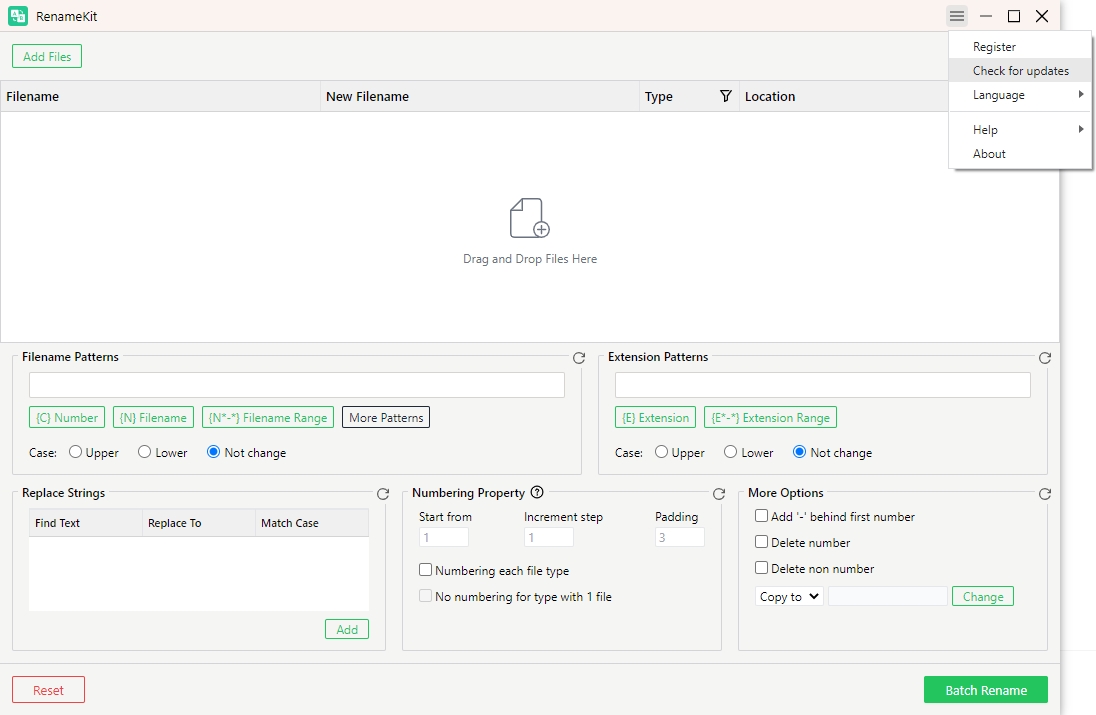
Go to the settings menu in the top menu bar and select “Check for Updates“. RenameKit will automatically search for any available updates. If an update is available, you will be prompted to download it.
7. How to Get Help for RenameKit?
Within RenameKit, go to the “Help” menu. Choose “User Guide” to read detailed guides on how to use RenameKit’s different features; Choose “Support” to learn FAQs about Swyshare products; Choose “Open log folder” to find log folder of RenameKit, send it to and get help from the Swyshare tech team.
